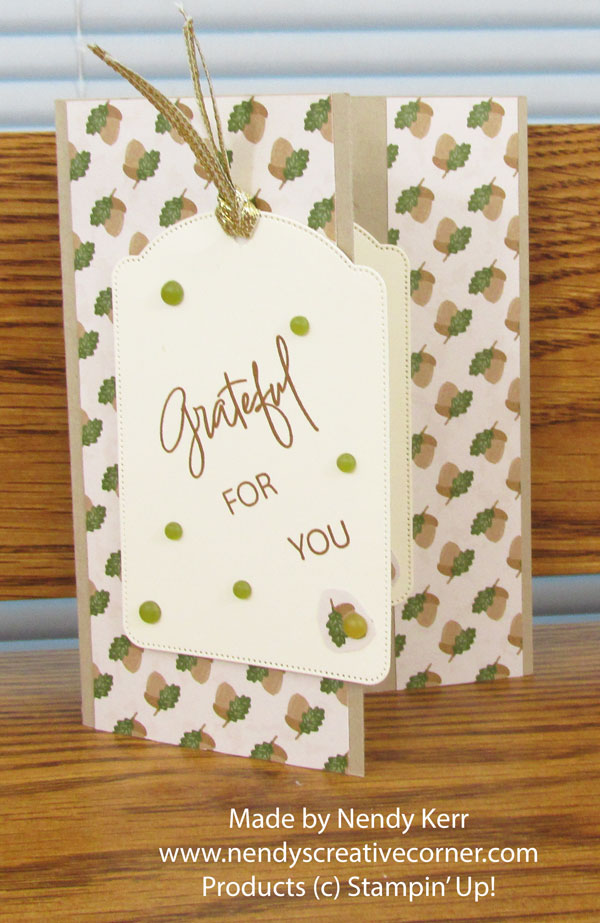
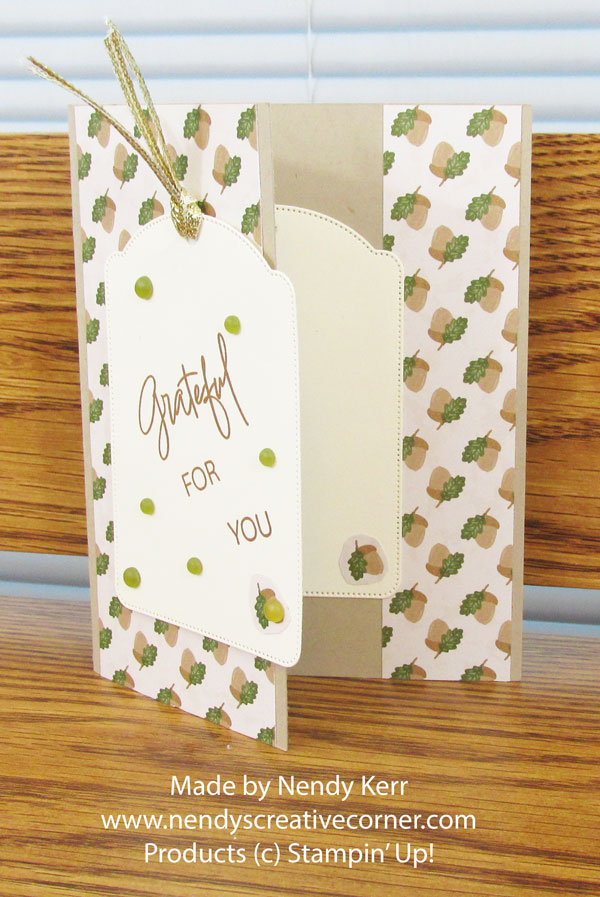
Use any paper and dies to make your own version of this card. I choose a Fall paper with acorns on it for my project.

SUPPLIES:
Stamps: Iconic Imagery Stamps (also part of a Die Bundle and Suite)
Ink Pad: Early Espresso ink pad
Cardstock: Crumb Cake cardstock
Iconic Celebrations 6×6 Designer Series Paper (DSP)
Stampin’ Cut & Emboss Machine: Greetings of the Season Dies (also part of a Bundle)
Embellishments: Faux Glass Dots
Gold & Silver 1/8″ Trim Combo Pack
Adhesives: Tombow Multipurpose Liquid Glue
Stampin’ Dimensionals
INSTRUCTIONS:
1-Cut Your Papers:
~Crumb Cake Card Base: 5-1/2″ x 7″. Score and fold at 4-1/4″.
~DSP Print 1: 2-1/2″ x 5-1/2″”
~DSP Print 2: 1-1/4″ x 5-1/2″
2-Word Label:
~Cut 2 Large Tags from Very Vanilla cardstock. Yes, they need to be cut with the same die.
~Lay out your stamps where you want them.
~Stamp your Words with Early Espresso ink.
~Cut Two 6″-7″ pieces of Gold Ribbon.
~Lay your Ribbon together, fold in half, and thread the fold through the Tag Hole from the back. Put the Ribbon ends through the loop that you made and pull tight.
~Cut out two acorns. Glue one to a lower corner of each Tag.

3-Card Base:
~Glue DSP Print 1 to the short front side of your Card Base leaving a border on each side.
~Close your Card Base.
~Center DSP Print 2 on the edge of your Card inside and glue it leaving a cardstock border at the edge and next to your Card Front.
~Glue your extra Very Vanilla Tag inside your Card where you want it. I glued mine so part of it was on DSP Print 2.
~Lay your Stamped Tag on your closed Card to determine where it will hang over the edge and not need Stampin’ Dimensionals. Put Stampin’ Dimensionals on the rest of the back and attach.
~Add Faux Glass Dots to your Tag. I added 2 large and 4 small.
Your Card is finished.


